How to Hide the drives(c:,d:,e:,a:...etc)
How to Hide the drives(c:,d:,e:,a:...etc)
This is a great trick you can play on your friends. To disable the display of local or networked drives when you click My Computer
1.Go to start->run.Type regedit.Now go to:
HKEY_CURRENT_USER\Software\Microsoft\Windows\CurrentVersion\Policies\Explorer
Now in the right pane create a new DWORD item and name it NoDrives(it is case sensitive). Now modify it's value and set it to 3FFFFFF (Hexadecimal) .Now restart your computer. So, now when you click on My Computer, no drives will be shown(all gone...). To enable display of drives in My Computer, simply delete this DWORD item that you created.Again restart your computer.You can now see all the drives again.
plz leave ur comments.....
welcome
 |
Earning world

Showing posts with label PC tip. Show all posts
Showing posts with label PC tip. Show all posts
Tuesday, April 19, 2011
Crack BIOS Password!!


Forgot BIOS Password ?
Do the following :
1. Open the CPU
2. Now, observe the motherboard.
3. You notice a coin like silver Battery(3V).
----------------------------------------- NOTE --------------------------------------------------------
This battery is 24 x 7 power supply for the BIOS, which is used to run the system clock will the main power is off. It also initiates the booting process when power is switched on.
-----------------------------------------------------------------------------------------------------------
4. Remove the battery from the motherboard.
(It is safe to remove the Battery)
5. Wait 30 seconds and place the battery back on the motherboard.
6. Now, when you start your system you won't be prompted for the BIOS password.
Enjoy !!!
------------------------------------ CAUTION -----------------------------------------------
1. Perform on your own risk !
2. You have to set the time of your computer when you start again.
---------------------------------------------------------------------------------------------------
Thursday, April 14, 2011
CHANGE NAME OF RECYCLE BIN
To change the name of the Recycle Bin desktop icon,
follow these steps
goto RUN type regedit
and then go to:
HKEY_CLASSES_ROOT/CLSID/{645FF040-5081-101B-9F08-00AA002F954E}
and change the name "Recycle Bin" to whatever you want (don't type any quotes).
plz leave ur comment
follow these steps
goto RUN type regedit
and then go to:
HKEY_CLASSES_ROOT/CLSID/{645FF040-5081-101B-9F08-00AA002F954E}
and change the name "Recycle Bin" to whatever you want (don't type any quotes).
plz leave ur comment
Baware of CTRL + C
Be careful while using ctl+c cmd.
when you are using it on internet
Its not the safe thing to do when you are online.
What happens when you press Ctrl+C while you are Online?
This copied data is stored in clipboard and is accessible from the net by a combination of Javascripts and ASP.
yes its true
if u dont believe me
Just try this:
1) Copy any text by Ctrl + C
2) Click the Link:
http://www.sourcecodesworld.com/special/clipboard.asp
3) You will see the text you copied was accessed in the above address.
so please don't keep sensitive data (like passwords, credit
card numbers,PIN etc.)in the clipboard while surfing the web.
how to stop this?
You can stop other from hacking your clipboard content by doing this:
Go to internet options of explorer
tools menu ->Internet option -> Security Custom level
In settings - disable the option
allow past operations via script.
what ever u type ur computer will speak
here is a trick to convert ur
TEXT to VOICE without any
software.
steps are
>go to run
>type
Control speech
>write any text
it will be converted to voice
TEXT to VOICE without any
software.
steps are
>go to run
>type
Control speech
>write any text
it will be converted to voice
Sunday, April 10, 2011
HOW to recover your data from a corrupted hard drive
HOW to recover your data from a corrupted hard drive,
first, you need another hard drive. It can be external if you want. But you HAVE to be able to mount it as a directory in DSL (damn small linux)
Download DSL (damn small linux)
Just in google search “Damn Small Linux Download”, you’ll find it.
now boot it
after booting you will see the GUI of the DSL, run TERMINAL
and follow this command
*Note: this command will make you a super user in DSL
#sudo su
*Note: this command will mount you HDD on DSL
#mount /dev/hda1 /mnt/hda1
*Note: this command will check if your data is still on the HDD
#cd /mnt/hda1
#ls -al
Found any data? If not stop
If yes move on.
Since you already have you new hard drive connected to your PC just run this command series.
#mount /dev/hdc1 /mnt/hdc1
#cd /mnt/hdc1
#mkdir backup
#cp -R /mnt/hda1/*.* /mnt/hdc1/backup
Use of PrintScreen for some fun.
You know the use of Print screen button on the keyboard [present on top right above insert] .
It captures the screen , right ?
But now I will tell you how to use it for some fun .
Take screen shot of the desktop by pressing Print Screen on the desktop .
Go to Paint and paste this .
Save it .
For Windows XP users
1) On the desktop right click -----> arrange icons by ----> De-select 'Show Desktop Icons '.
2) Now right click the taskbar and select properties .
3) Check auto hide the taskbar. Click OK.
4) Now change your wallpaper and keep the one you saved earlier.
5) If paint is not closed, select File ---------> 'Set as background (Centered) '.
Now on the desktop even if you click any icon nothing will happen !!!
Now do I need to tell youhow you can use it for fun on someone else's PC ?
To revert back to normalcy change the wallpaper and select 'show desktop icons' on the right click menu .
FOLDER OPTIONS ARE MISSING
Many times we find that the folder options missing in windows explorer Here is the solution for that Open Run and then type "gpedit.msc". Now goto User Configuration > Administrative templates > Windows Component > Windows Explorer. Click on Windows Explorer you will find the 3rd option on the right side of screen "Removes the Folder Option menu item from the Tools menu" Just check it, if it is not configured then change it to enable by double clicking on it and after applying again set it to not configured it will work......
You can put shortcuts for shortcuts!!
You can put Keyboard shortcuts for desktop shortcuts.
To do this follow these steps :
1) Right click on the shortcut.
2) Go to properties.
3) Click once on the "Shortcut Key" bar.
4) Press any alphabet that you want to use as Shortcut Key.
5) Press OK Now to open that shortcut,
Press CTRL+ALT+"the alphabet".
To do this follow these steps :
1) Right click on the shortcut.
2) Go to properties.
3) Click once on the "Shortcut Key" bar.
4) Press any alphabet that you want to use as Shortcut Key.
5) Press OK Now to open that shortcut,
Press CTRL+ALT+"the alphabet".
ENABLE TASKMANAGER
If you have any viruses, then you may notice that they affect to the task manager and disable it
This is because if we know that there is a virus active in our background there’ll be a chance to stop it using task manager.
Disable task manager doing by viruses editing the computer registry.
Here how you can fix and get back the Task manager again.
"Method 1":Click Start >> Run >> and type the code below and press Enter.
REG add HKCU\Software\Microsoft\Windows\CurrentVersion\Pol icies\System /v DisableTaskMgr /t REG
"Method 2":Click Start>> Run>> and type Regedit.exe (open registry editor)
Navigate to the HKEY_CURRENT_USER \ Software \ Microsoft \ Windows \ CurrentVersion \ Policies\ System .In the right-pane, delete the value named DisableTaskMgrClose Registry editor. You may want to restart you computer for changes take effect.
"Method 3":Click Start >> Run >> type gpedit.msc (Open Group policy editor)
Navigate to:User Configuration / Administrative Templates / System / Ctrl+Alt+Delete Options / Remove Task Manager .Double click the Remove Task Manager option.Change the policy to Not Configured and click ok
Monday, March 21, 2011
New Sound Blaster Drivers
New Sound Blaster Drivers
With the loads of problems reported by users with Soundblaster cards on Windows XP Creative has stepped up and offered drivers for at least some models of their Sound Blaster cards, but check your particular model closely.
I have downloaded the SB128 drivers and my sound problems have been resolved..! So they do work.
http://www.creative.com/support/winxp/
Increase the printing speed of your printer
Increase the printing speed of your printer
You can improve the printing speed of your printer with managing the print spooler option.
Basically printer spooler holds your prints for some time then send to printer for print out.
By default on most printers, printer spooler option is enabled but you turn off to specify that the file should be sending to the printer and not spooled. Here printer spooler option might be different location in your printer but on most printers you can turn off by going to Start, Setting then Printers.
Now right click on the icon of the printer that you are using.
Click Properties and select the Advanced tab.
Here click on “Print directly to printer” option.
This will tie up your application until the printer has all the data, but your print job should finish more quickly.
Printing directly to the printer will also come in handy if your print spooler crashes and you need to print before you reboot your PC.
TRICK FOR CALCULATORS
HEY DONT LAUGH.....MOST OF THE CALCULATORS HAVE THE BUTTON TO SWITCH THEM ON BUT THEY OFF ITSELF......
MEANS NO BUTTON TO SWITCH THEM OFF.....
OK ....USE THIS TRICK TO SHUT DOWN UR CALCULATORS.....
JUST PRESS FOLLOWING KEYS CONTINUOUSLY
FIRST FIND THESE KEYS ON UR CALCULATOR
DIVIDE KEY
MULTIPLY KEY
PERCENT KEY
CHECK KEY
CORRECT KEY
SO ITZ NOW-->
/ X % CHECK CORRECT CORRECT
OR U CAN SAY
DIVIDE MULTIPLY PERCENT CHECK CORRECT CORRECT
DONE...
Friday, March 11, 2011
Remove every copy songs which are twice or thrice
SAME SONGS TWICE OR THRICE IN UR PC...???
R U FRUSTRATED ON HAVING SAME SONGS TWICE OR THRICE IN UR PC...???
HERES ALL IN ONE ULTIMATE SOLUTION...
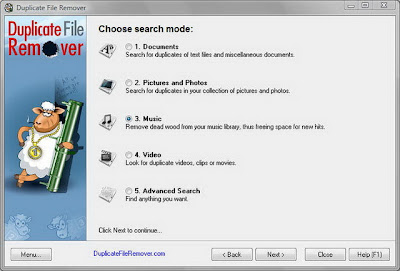
Duplicate File Remover is a powerful tool to locate file duplicates on your computer (dedupe). It scans the computer and lists duplicate files based on Byte for Byte Comparison, which ensures 100% accuracy. It can find duplicates of any files: text, binary, music, video or images. For multimedia files (MP3, OGG/Vorbis, WMA), the contents of the following tags can also be analyzed: "Artist", "Album", "Title" and "Comment". The file Summary property can also be searched: title, subject, category, and author. Duplicate files can be deleted, hard-linked, moved, or copied. The list of duplicate files can be sorted, exported to an HTML report, and acted upon.
DOWNLOAD IT (INCLUDING PATCH)
http://rapidshare.com/files/105256740/Duplicate_File_Remover_1.5.464_By_Lode.rar
Take Your Favourite DVD Movies Wherever You Go - Without Carrying Any DVD
Take Your Favourite DVD Movies Wherever You Go - Without Carrying Any DVD
Looks like a tricky thing to say, however not only it is possible, but it is also easy and fast. I can imagine how astonished you are to read this, as much as I was when I knew what Extra DVD Ripper Express is able to do regarding such a task. A task that seems to be a job for professional video editors rather than someone like me who is only interested in taking his favourite DVD movies in a portable device when I travel without having to battle with a mess of DVDs.
Since 2004 Extra Corporation Senior Tech Team are striving to develop some of the most high quality and efficient digital video and DVD software. To achieve this goal, they designed a DVD transcoding and authoring technology which brings excellent performance features. On that basis lies the success of this video ripping solution that is able to satisfy the needs of beginners as well as expert users.
Extra DVD Ripper Express is a versatile DVD ripper application, it is extremely easy to use, and it will help you to convert DVD movies into almost every format including AVI, VCD, MPEG, and many other with no quality loss.

Aesthetics, Features & Functionality
A detailed look at the software will result in the appreciation of its interface which is as user friendly as it can be with no complicated menus or procedures at all, everything is right there in front of your eyes.
Another important feature is that you will be able to watch the movie while you are ripping it, you will also know exactly at which point of the conversion progress you are at any time. So, all you have to do is to select the DVD source, the outcome format and enjoy. Extra DVD Ripper Express will do the rest for you.

Extra DVD Ripper Express is able to ripp all your DVD movies to: AVI, DivX, XviD, VCD, SVCD, MPEG, Apple iPod, Apple iPhone, Apple TV MP4 Video file, Sony PSP MP4, Sony PS3 Video file,YouTube FLV Video file, RM RMVB Video file, WMV Video file, Microsoft Zune Player for WMV and MP4 Video file.

This amazing program guarantees the quality of both video and audio for the outcome thanks to its latest industry standard compression technology.

You will get a smaller file with virtually the same quality of the original, besides, you will have the choice of including any of the available subtitles and Audio tracks. NTSC and PAL video formats are supported.
Extra DVD Ripper Express offers you a lifetime FREE Technical Support, FREE upgrades and a 30-day money back guarantee along with your acquisition.

Finally
This stable and powerful DVD ripper tool is the result of more than a year of development and two years for beta testing and getting perfection at its finest expression. Nevertheless, they keep working continually in order to improve functionality through the incorporation of state-of-the-art technology. Satisfaction guaranteed!
Looks like a tricky thing to say, however not only it is possible, but it is also easy and fast. I can imagine how astonished you are to read this, as much as I was when I knew what Extra DVD Ripper Express is able to do regarding such a task. A task that seems to be a job for professional video editors rather than someone like me who is only interested in taking his favourite DVD movies in a portable device when I travel without having to battle with a mess of DVDs.
Since 2004 Extra Corporation Senior Tech Team are striving to develop some of the most high quality and efficient digital video and DVD software. To achieve this goal, they designed a DVD transcoding and authoring technology which brings excellent performance features. On that basis lies the success of this video ripping solution that is able to satisfy the needs of beginners as well as expert users.
Extra DVD Ripper Express is a versatile DVD ripper application, it is extremely easy to use, and it will help you to convert DVD movies into almost every format including AVI, VCD, MPEG, and many other with no quality loss.
Aesthetics, Features & Functionality
A detailed look at the software will result in the appreciation of its interface which is as user friendly as it can be with no complicated menus or procedures at all, everything is right there in front of your eyes.
Another important feature is that you will be able to watch the movie while you are ripping it, you will also know exactly at which point of the conversion progress you are at any time. So, all you have to do is to select the DVD source, the outcome format and enjoy. Extra DVD Ripper Express will do the rest for you.
Extra DVD Ripper Express is able to ripp all your DVD movies to: AVI, DivX, XviD, VCD, SVCD, MPEG, Apple iPod, Apple iPhone, Apple TV MP4 Video file, Sony PSP MP4, Sony PS3 Video file,YouTube FLV Video file, RM RMVB Video file, WMV Video file, Microsoft Zune Player for WMV and MP4 Video file.
This amazing program guarantees the quality of both video and audio for the outcome thanks to its latest industry standard compression technology.
You will get a smaller file with virtually the same quality of the original, besides, you will have the choice of including any of the available subtitles and Audio tracks. NTSC and PAL video formats are supported.
Extra DVD Ripper Express offers you a lifetime FREE Technical Support, FREE upgrades and a 30-day money back guarantee along with your acquisition.
Finally
This stable and powerful DVD ripper tool is the result of more than a year of development and two years for beta testing and getting perfection at its finest expression. Nevertheless, they keep working continually in order to improve functionality through the incorporation of state-of-the-art technology. Satisfaction guaranteed!
How To Copy Movie from a Scratched CD
How To Copy Movie from a Scratched CD
How To Copy Movie from a Scratched CD
This is the most common problem, people encounter. They get a CD/DVD on rent and try to copy the movie. But alas, the CD is scratched, so after sometime, you get a cyclic redundency check error.
Well, things are not as hopeless as it seems. Here are few methods:
--[ONE ]-- Use Nero to create an image of the media. In most of the ways, this happens, so that you can later use Nero Image Drive to mount the CD and then view it.
Friday, February 25, 2011
Copy, Copy Protected CD's or DVD's
Copy, Copy Protected CD's or DVD's
Copy, Copy Protected CD's or DVD's Through....
Freedom from copy-protection formats! Create copies of copy-protected music, audio book and video files.
Tunebite Platinum not only frees your music and audio books from copy protection, it frees your music videos as well. In addition to Tunebite Premium's functions, Tunebite Platinum automatically plays and records copy-protected WMV and M4V videos, and saves the recordings as unprotected MP3, OGG, WMA and WAV files. Enjoy videos you've purchased online at home on your PC!
Software for creating unprotected copies of copy-protected audio and video filesTired of DRM-protected file formats like WMA, M4P, AA, M4B, MP4, M4V and WMV getting in your way? Tunebite records your copy-protected music, audio book and video files as they are being played and saves the recordings as unprotected audio (MP3, OGG and WMA) and video (WMV and MP4) files you can use anywhere. Tunebite’s clever approach has been reviewed and praised by numerous trade journals and internet portals around the world as the ideal and totally legal solution for creating private copies of copy-protected files.
http://rapidshare.com/files/39490802/Tune_Bite.rar
RAR Password is DIsCOvER ANd DEStROYeR
Tips to recover scratched CD's
Tips to recover scratched CD's
Don't you feel like crying every time you add another disc to your pile of scratched discs. Trashing that disc which contained your favorite songs, pics, files, games or videos is not easy.
Read-on, if you find yourself wishing for a miracle every time your fav CD is scratched:
Home Remedy :
here's an easy home remedy, which might give you the desired results. Rub a small amount of toothpaste on the scratch and polish the CD with a soft cloth and any petroleum-based polishing solution (like clear shoe polish). Squirt a drop of Brasso and wipe it with a clean cloth.
Technology to the rescue
There are many softwares available on the net, which enable the recovery of the CD data. BadCopy Pro is one such software, which can be used to recover destroyed data and files from a range of media
Just a few clicks is all it requires to recover the disc from almost all kind of damage situation; be it corrupted, lost data, unreadable or defective.
DiskDoctors is another popular company, which offers both software and solutions to recover data from a scratched CDs and DVDs.
General Tips:
* Always wipe the CD from the center outward with stratight spoke-like strokes. Wiping CDs in circles will create more scratches.
* Do not scratch the graphics layer as you cannot repair the disc.
HINT: Hold the disc up to a light with the graphics layer facing the light source. If you can see light thru the scratches at any point then the disc may be irreparable and or exhibit loading or playing errors.
* Clean your Disc players lens regularly with a suitable product to ensure optimal viewing pleasure.
* Make sure to use a soft, lint-free cloth to clean both sides of the disc. Wipe in a straight line from the centre of the disc to the outer edge.
* If wiping with a cloth does not remove a fingerprint or smudge, use a specialized DVD disc polishing spray to clean the disc.
* Only handle the disc by its outer edge and the empty hole in the middle.
Monday, January 17, 2011
Hide ur drives
Hide ur drives
How to Hide the drives(c:,d:,e:,a:...etc)
How to Hide the drives(c:,d:,e:,a:...etc)
This is a great trick you can play on your friends. To disable the display of local or networked drives when you click My Computer.
1.Go to start->run.Type regedit.Now go to:
HKEY_CURRENT_USERSoftwareMicrosoftWindowsCurrentVersionPoliciesExplorer
Now in the right pane create a new DWORD item and name it NoDrives(it is case sensitive). Now modify it's value and set it to 3FFFFFF (Hexadecimal) .Now restart your computer. So, now when you click on My Computer, no drives will be shown(all gone...). To enable display of drives in My Computer, simply delete this DWORD item that you created.Again restart your computer.You can now see all the drives again. Magic........lol....
How to Hide the drives(c:,d:,e:,a:...etc)
How to Hide the drives(c:,d:,e:,a:...etc)
This is a great trick you can play on your friends. To disable the display of local or networked drives when you click My Computer.
1.Go to start->run.Type regedit.Now go to:
HKEY_CURRENT_USERSoftwareMicrosoftWindowsCurrentVersionPoliciesExplorer
Your Ad Here |
Now in the right pane create a new DWORD item and name it NoDrives(it is case sensitive). Now modify it's value and set it to 3FFFFFF (Hexadecimal) .Now restart your computer. So, now when you click on My Computer, no drives will be shown(all gone...). To enable display of drives in My Computer, simply delete this DWORD item that you created.Again restart your computer.You can now see all the drives again. Magic........lol....
How To Enable Task Manager
How To Enable Task Manager.....
Click Start
Click Run
Type REGEDIT
Click OK The Registry Editor will now open
Browse to the following key:
HKEY_CURRENT_USE>Software>Microsoft>Windows>
CurrentVersion>Policies>system
In the right pane, look for the value: DisableTaskMgr
Right click DisableTaskMgr and select Delete. (When prompted with "Are you sure you want to delete this value", select Yes.
Close the Registry by choosing
You should now be able to access Task Manager. If not, reboot into Safe Mode and repeat the steps outlined above.
=====================================================
WHEN VIRUS ENTERS THE PC, IT DISABLES TASK MANAGER.....
THIS IS VERY HELPFUL @ THAT TIME......
Subscribe to:
Posts (Atom)